Printing and Scanning for Students
Printing System for Students
Multifunctional devices equipped with the Princh printing system are available in each KVK faculty library. With Princh, you can print from any smart device or computer. There is no need to install additional programs, create user accounts, or anything similar. All printing jobs in this system are paid electronically.
Supported File Formats
Princh supports popular printing formats:
- CAD (AutoCAD Drawing, AutoCAD Drawing Interchange Format);
- Text (AbiWord Document, DjVu, Microsoft Word, Microsoft Office Open XML, HTML Document, ODF Text Document, Pages Document, Portable Document Format, Rich Text Format, etc.);
- E-books (Amazon Kindle, Comic Book Archive file, IDPF/EPUB, FictionBook, Microsoft Reader, Sony media, Open eBook File, Palm Media, etc.);
- Graphic Files (Windows Bitmap, Graphics Interchange Format, Portable Network Graphic, Adobe Photoshop bitmap, Compressed Scalable Vector Graphics, Tagged Image File Format, etc.);
- Presentations (Keynote Presentation, OpenDocument Presentation, PowerPoint Slide Show, Microsoft PowerPoint 97/2000/XP, etc.);
- Spreadsheets (CSV, Open Document Spreadsheet, Microsoft Excel 97/2000/XP, Microsoft Excel XML, etc.);
- Vector Files (Adobe Illustrator File, CorelDRAW Image File, Encapsulated PostScript, Scalable Vector Graphics, Compressed Scalable Vector Graphics, Visio Drawing File, etc.).
For a complete list of formats supported by Princh, click here. The recommended printing format is Portable Document Format (PDF). It is best to save Word, PowerPoint, and Excel files in PDF format before printing.
Printed QR Codes and IDs
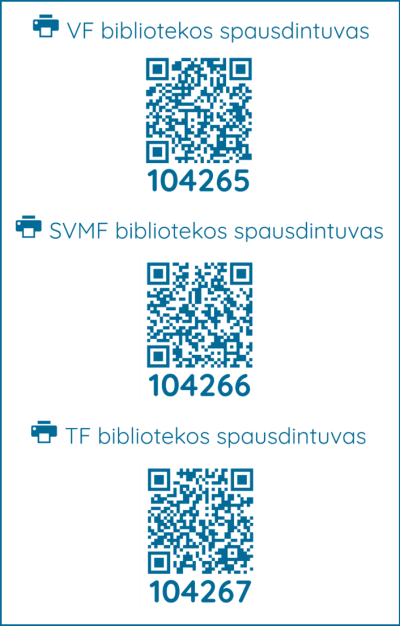
QR codes are needed when printing documents using a smart device. Multifunctional device IDs are required if you want to print files via the website https://print.princh.com/.
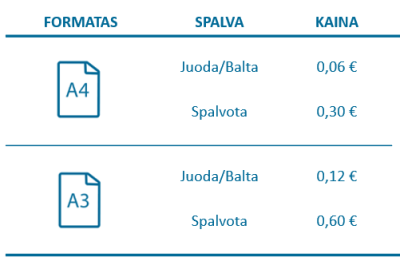
Printing Rates
Payments for printing services can only be made electronically on the Princh website: https://print.princh.com/.
Refunds for printed files are only issued in the event of printer malfunction. We recommend carefully reviewing your work in the Princh system and additional programs before printing.
Printing from a Computer
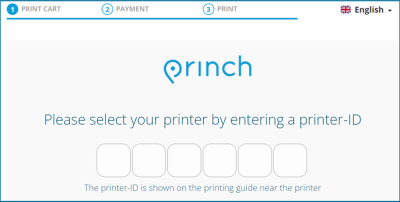
Open any web browser and go to https://print.princh.com/.
Enter the printer ID (a 6-digit combination) for the faculty you are in. For example, the Business Faculty printer ID is 104265.
Click “Click here to select and upload a file…” and upload your files.
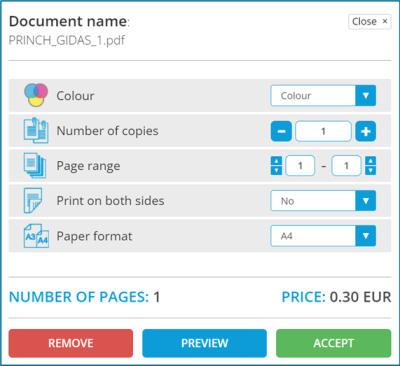
Select the appropriate print settings.
- Colour – Choose whether to print in color (Colour) or black and white (Black/White).
- Number of copies – Indicate how many copies of the same file you want to print.
- Page range – Specify which pages of the uploaded document should be printed if you don't want to print the entire file.
- Print on both sides – Choose whether to print on one side (No) or both sides (Yes) of the paper.
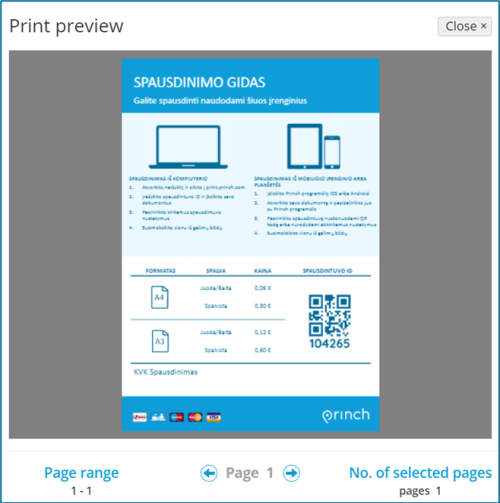
The PREVIEW button allows you to see how the file will be printed. After making adjustments, click ACCEPT.
Before proceeding with the next steps, review the file you are about to print. This ensures that your file is not corrupted, all pages are in order, and text and other elements are not distorted. If you print a file with these issues, no refund will be given. You can preview the file in the Princh window by clicking here:
Document Preview Window:
Before uploading a PDF file to the Princh program, it is useful to check it in a PDF viewer. You can find one of the following programs on college computers:
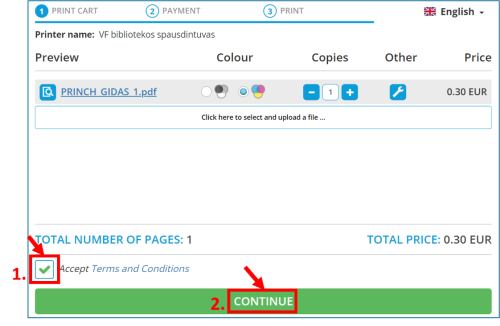
After reviewing the file, check the box next to Accept Terms and Conditions, then click CONTINUE.
Make the payment and wait for your file to be printed.
Printing from a Smart Device
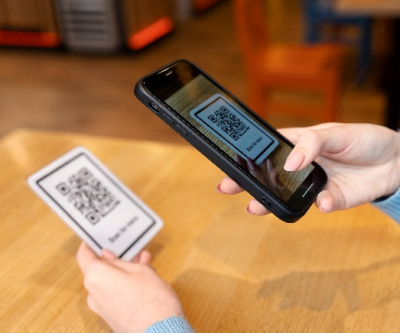
Use the camera or scanner on your smart device to scan the QR code of the multifunctional device.
Follow the same steps you would on the website https://print.princh.com/.
Scanning
Every student can scan documents for free from any multifunctional device at the institution.
You can find the multifunctional devices at these locations:
| Nr. | Vieta |
| 1. | Faculty of Health Sciences, Dariaus ir Gireno g. 8, first floor. The device is next to room 12. |
| 2. | Faculty of Health Sciences, Dariaus ir Gireno g. 8, second floor. The device is in the reading room. |
| 3. | Faculty of Health Sciences, Dariaus ir Gireno g. 8, third floor. The device is in the Teacher's Room. |
| 4. | Faculty of Technology, Bijunu g. 10, first floor. The device is next to room 122. |
| 5. | Faculty of Technology, Bijunu g. 10, second floor. The device is in the library. |
| 6. | Faculty of Technology, Bijunu g. 10, second floor. The device is next to room 226. |
| 7. | Faculty of Business, Jaunystes g. 1, first floor. The device is in the library. |
| 8. | Faculty of Business, Jaunystes g. 1, first floor. The device is next to room 110. |
| 9. | Faculty of Business, Jaunystes g. 1, first floor. The device is next to room 121. |
| 10. | Faculty of Business, Jaunystes g. 1, second floor. The device is in room 202. |
| 11. | Faculty of Business, Jaunystes g. 2, second floor. The device is in the hallway opposite the stairs. |
| 12. | Faculty of Business, Jaunystes g. 2, fourth floor. The device is in the hallway next to the stairs. |
Scanning for Yourself or Someone Else
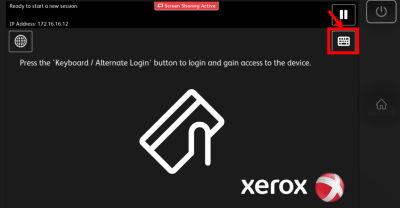
Press the button on the keyboard.
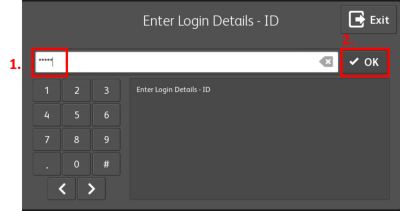
Log in to the scanner with the PIN code: 99887.
To scan loose pages, place them in the automatic document feeder or on the glass.
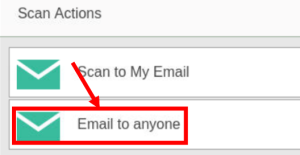
In the multifunction device menu, click Scan.
Select Email to anyone.
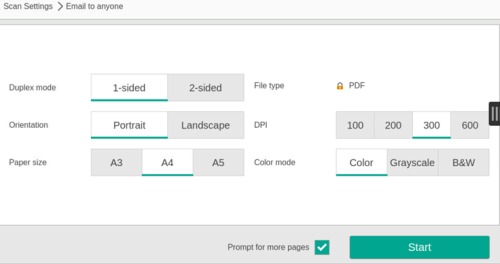
In the Email to: field, enter the email address where the scanned document will be sent. Click Change settings to adjust scanning parameters as needed. To start scanning, press Start.
Scanning Parameters:
Duplex mode (Double-sided mode). 1-sided scans only one side of the page. 2-sided scans both sides.
Orientation. Portrait (vertical). Landscape (horizontal).
Paper size: A3, A4, A5.
DPI (Resolution): 100, 200, 300, 600.
Color mode: Color, Grayscale, B&W.
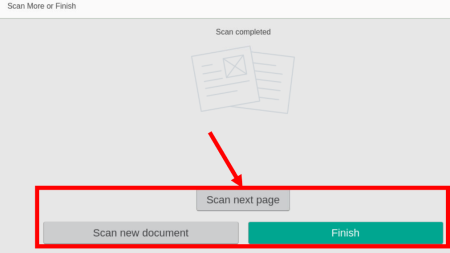
To scan the next page, select Scan next page. To scan a new document, select Scan new document. If you want to finish scanning, click Finish.
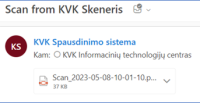
After scanning, the device sends the scanned file to the specified email address.
When finished, remember to log out of the scanner by pressing the button: ![]() .
.
Common Issues
When using the Princh printing system for color PDF files, some students encounter problems: images or other graphical objects are not printed. Below is information on how to properly prepare a PDF file for printing to avoid such issues.
PDF Document Flattening
PDF flattening removes transparency from images and converts them into a format that is easier to understand and process in the Princh system.
Method 1
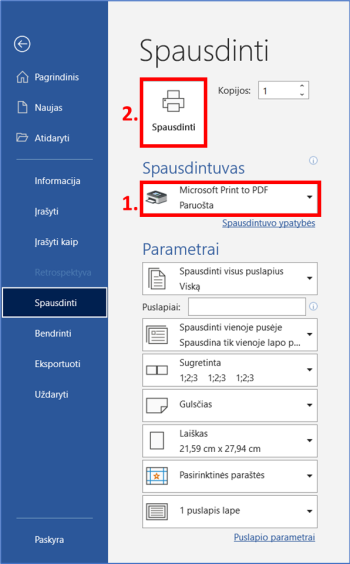
1. Open the .DOC, .DOCX file in Word or the .PDF document in your chosen PDF viewer.
2. Press Ctrl and P on the keyboard simultaneously.
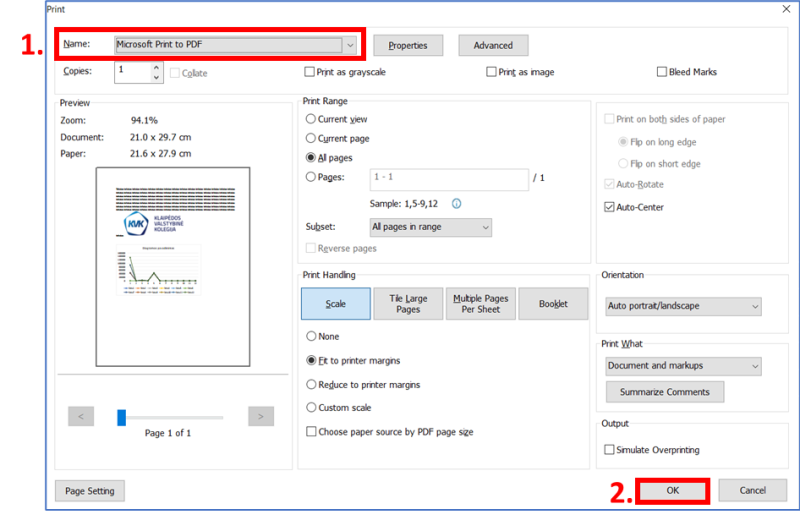
3. In the window that opens, select Microsoft Print to PDF in the Printer section and click Print.
4. Choose the folder where you want to save the new PDF file. Enter a file name and click Save.
5. You can now upload the created file to the Princh system and print it.
Example in PDF Viewer:
Method 2
If your file does not contain personal or sensitive information, you can upload your file for flattening to one of the websites listed below:
