Xerox AltaLink 8030, 8035 (Library Printers) User Manual
Device Login
1. Press the keyboard symbol:

2. Enter your login credentials and click “OK”:

Device Control Panel:

Print all – Print All Documents
Print Release – Select Documents to Print from the List
Scan - Scanning
Access Device – Device Menu:

Copy - Copying
Jobs – Job List
Device – Device Settings
PaperCut MF – Printing/Scanning
Copying

2-Sided Copying
Paper supply – Paper Format Selection
Collation - Sorting
Reduce / Enlarge
Original type – Original Document Type
Lighten / Darken
Original Orientation
Original Size
Printing

Select the desired documents to print and press “Print”
Scanning

Start – Start Scanning
Promt for more pages – Scan Multiple Documents into One File (PDF)
Change settings – Scanning Settings

Duplex mode
Orientation
Paper size
File type
DPI – Document Resolution
Color mode
Start
Back
Device Maintenance
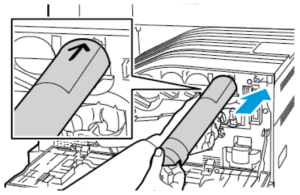
Replacing the Toner Cartridge
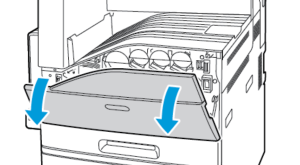
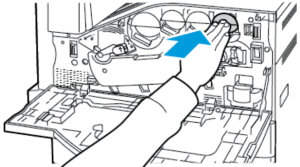
1. Open the front doors of the device.
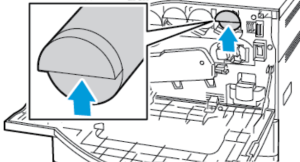
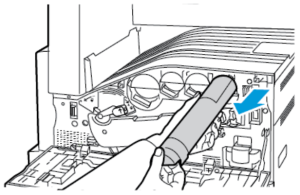
2. Grasp the cartridge holder with your fingers and pull it out.
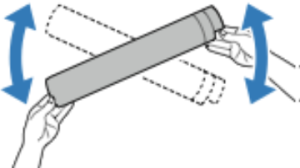
3. Unpack the new cartridge and shake it several times.
4. Flip the cartridge with the arrow pointing up, insert it into its slot, and slowly push it all the way in.
5. Gently press to ensure the cartridge is fully inserted.
6. Close the device doors.
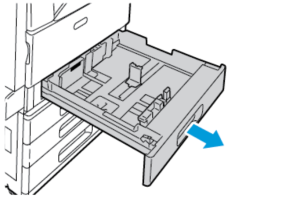
Adding Paper
1. Open the paper tray.
Attention!: To avoid paper jams, do not change the paper while the device is operating.
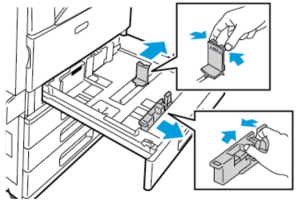
2. Adjust the guides according to the size of the paper being loaded.
Attention!: Use the markings on the bottom of the tray for proper size adjustment.
3. Separate and align the paper sheets before loading.
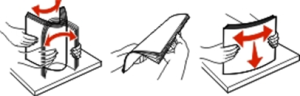
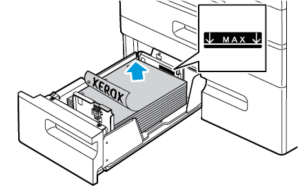
4. Insert the paper with the print side facing up.
Attention! Ensure the paper quantity does not exceed the indicated level. Overloading may cause paper jams.
5. Close the tray.