Document Library (for employees)
Link: https://dok.kvk.lt/
The Document Library contains division regulations, orders, various instructions, and other relevant documents.
All employees have access to the Public Area (Vieša sritis) folders, while Internal documents (Vidiniai dokumentai) can only be accessed by employees delegated by the departments.
Folder and file viewing and navigation
To view folders and files in the Document Library, log in to https://dok.kvk.lt/ using your work email address and general system password.
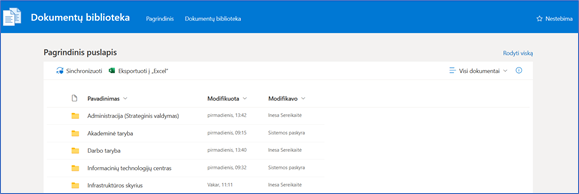
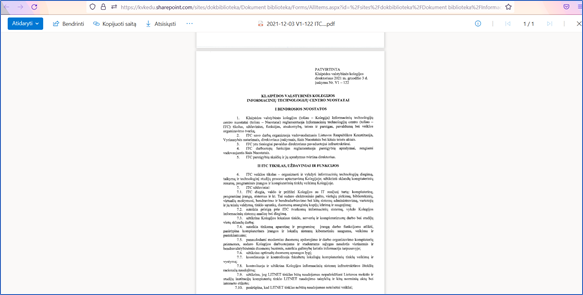
Click on the folder name. Select the file you want to view and click on it. The file will open in a new browser tab.
To return to the previous folder, go back to the tab where the Document Library window is open. In the row above the folders and files window, click on the name of the folder you want to return to.

To download selected files or folders, check them with the checkboxes and click Download. More than one file or folder will be downloaded in ZIP format.

Changing the appearance of files and folders displayed in the Document Library
The Document Library site allows you to change the width of visible columns and the size of displayed item icons.
To change the width of a column, hover your mouse over the end boundary of the column, click and hold the left mouse button, and drag the column.
Example of changing the width of the Name column:

You can change the size of file and folder icons by clicking on All documents in the top right corner of the Document Library and selecting the desired view.

NOTE: The display changes you make do not affect the view seen by other users.
Creating and uploading folders and files
Employees with editing rights can create and upload folders and create or upload files of various formats (Office documents, video and audio materials, links, etc.) in their assigned folders.
To create a new folder or file, click New and select the type of item you want to create.

If you want to upload a file(s) or folder(s) from your computer, click Upload and select the type of item you want to upload.

Select the file(s) or folder(s) you want to upload, click Open, and wait for the selected item(s) to upload.

NOTE: New objects in the Document Library can only be created in the Public Area and Internal documents folders. Created or uploaded folders and files inherit the viewing and editing rights of the respective folder.
Deleting and restoring folders and files
Document Library users with editing rights can delete files and folders. Deleted items can be restored within 93 days of deletion.
To delete an item(s) from the Document Library, check the file(s) or folder(s) with the checkboxes and select Delete.

If you want to check which items you have deleted or restore them, click Recycle Bin in the top menu of the Document Library.

Check the files or folders you want to restore and click Restore.

The items will reappear in the folders from which they were deleted.
How to create a direct link to the Document Library, its individual folders on your desktop, or in your personal OneDrive?
Creating a direct link to the Document Library or its folders on the desktop
Right-click anywhere on the desktop, select New → Shortcut.

In the window that opens, enter the Document Library site address (https://kvkedu.sharepoint.com/sites/dokbiblioteka) and click Next.

Enter the desired name for the shortcut and click Finish.

Example of the created shortcut:

You can create direct links to individual folders in the Document Library in the same way.
To get a link to a specific folder, check the folder in the Document Library and select Copy link.

Click Copy.

Synchronizing the Document Library in your personal OneDrive
To have a link to the Document Library or its individual folders in OneDrive, open the folder you want to link and click Sync.
Example of creating a link to the IT Center folder:

Click Open link.

After successfully creating a link to a folder in OneDrive, you will find a section named Klaipėdos valstybinė kolegija in your file viewer. Expanding this section will show the synchronized Document Library folder.

All changes made in OneDrive will automatically be reflected on the Document Library website.
If you no longer want the Document Library folder to be synchronized with your OneDrive account, right-click on the folder and select Settings.

Next to the folder you no longer want to sync, click Stop sync and confirm your choice by clicking Stop sync again.

NOTE: Document Library links in OneDrive can only be created if OneDrive sync is enabled on your computer.