Turinys
Lexmark CX725dhe (corridor printers) User Manual
Device Control Panel:
- Display
- Device Main Menu
- Power On/Off
- Keypad
- Pause
- Start Work
- Reset Settings
- Cancel Job
- Delete
- Volume Up/Down
- Headphone/Speaker Connection
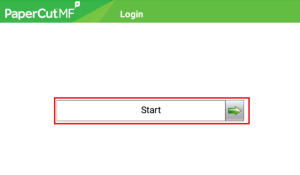
Device Login
Press “Start”:
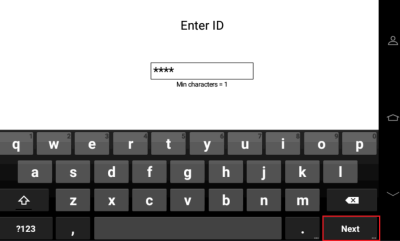
2. Enter your login credentials and click “Next”:
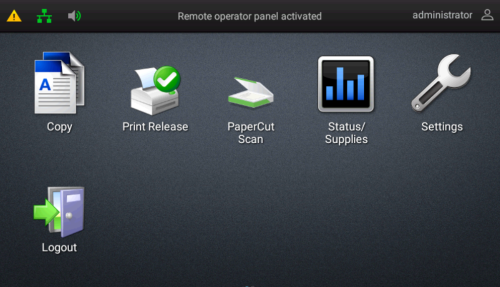
Copy
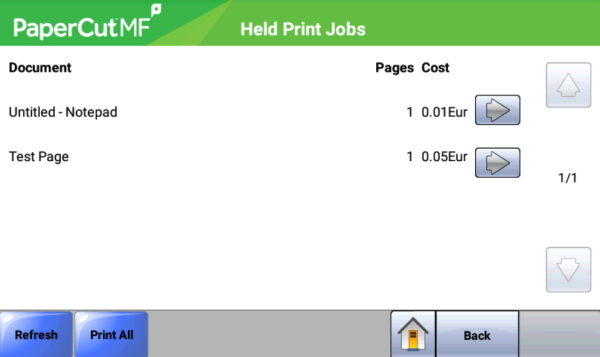
Print Release
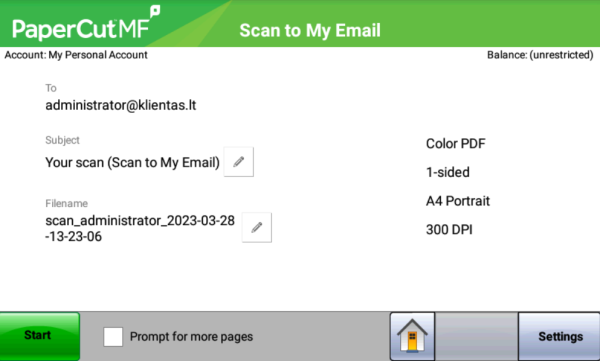
PaperCut Scan – Scanning to Email
Status / Supplies – Device Status, Consumables
Settings
Logout
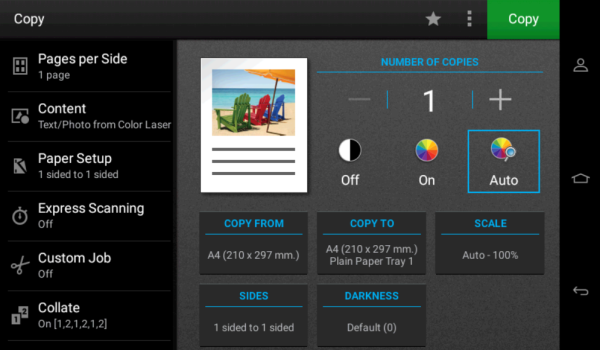
Copying
Number of copies
Off – Black and White Copying
On – Color Copying
Auto – Automatic Color Detection for Copies
Copy from – Format of Documents to be Copied
Copy to – Format of Copied Documents
Scale – Enlargement/Reduction
Sides – Single-Sided/Double-Sided Pages
Darkness – Darkening/Lightening
Printing
- Spausdinti dokumentą
Print All
Refresh – Refresh List of Documents to be Printed
Back – Return to Main Menu
Scanning
Start – Start Scanning
Promt for more pages – Scan Multiple Documents into One File (PDF)
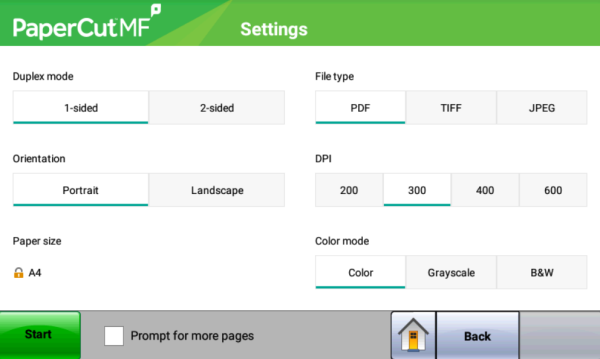
Settings – Scanning Settings:
Duplex mode
Orientation
File type
DPI – dokumento rezoliucija
Color mode – Document Resolution
Start
Back
Device Maintenance
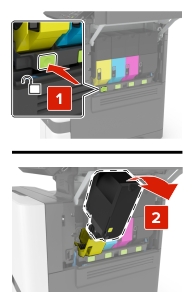
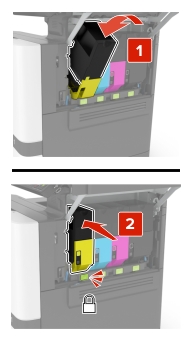
**Replacing the Toner Cartridge**
1. Open the side doors.
2. Remove the toner cartridge.
3. Unpack the new toner cartridge.
4. Insert the new toner cartridge.
5. Close the side doors.
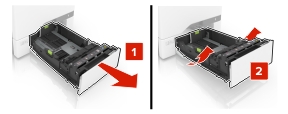
Adding Paper
1. Open the paper tray.
Attention!: To avoid paper jams, do not change the paper while the device is operating.
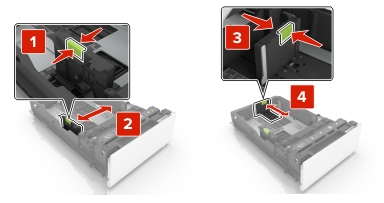
2. Adjust the guides according to the size of the paper being loaded.
Attention!: Use the markings on the bottom of the tray for proper size adjustment.
3. Separate and align the paper sheets before loading.
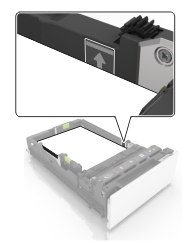
4. Insert the paper with the print side facing up.
Attention! Ensure the paper quantity does not exceed the indicated level. Overloading may cause paper jams.
5. Close the tray.

